Table of Contents
Hey, fellow coffee lovers! If you’re anything like me, your day starts with one magical word – coffee. And if you’re the proud owner of a Mr. Coffee maker, you’re in for a treat! But wait, do you know how to unleash the full potential of your coffee maker? No worries; I’ve got your back. In this guide, we’ll break down everything you need to know about how to use a Mr Coffee maker. Get ready for delicious brews and caffeinated adventures!
What’s the Buzz About Mr. Coffee?
Before we dive into the brewing process, let’s take a moment to appreciate your coffee maker. Mr. Coffee has been a household name for decades, delivering dependable and affordable coffee makers that make your mornings a whole lot better. Whether you’re a fan of classic drip coffee or crave fancier espresso-style drinks, Mr. Coffee has a machine for you.
Unboxing Your Mr. Coffee Maker
The first step in your coffee-making journey is unboxing your Mr. Coffee maker. Here’s what you’ll typically find inside:
- Coffee Maker Base: This is the main body of your coffee maker, containing the heating element and controls.
- Glass Carafe: Your carafe is where your brewed coffee will go. It usually has a handle for easy pouring.
- Brew Basket: The brew basket is where you place your coffee grounds or filter.
- Water Reservoir: This is where you add the water for brewing.
- Coffee Filter: Some models include a reusable or disposable coffee filter.
- Warming Plate: This is the heating plate where your carafe sits to keep the coffee hot.
- Controls: Your coffee maker may have buttons or switches for various functions like brew strength, delay brew, and more.
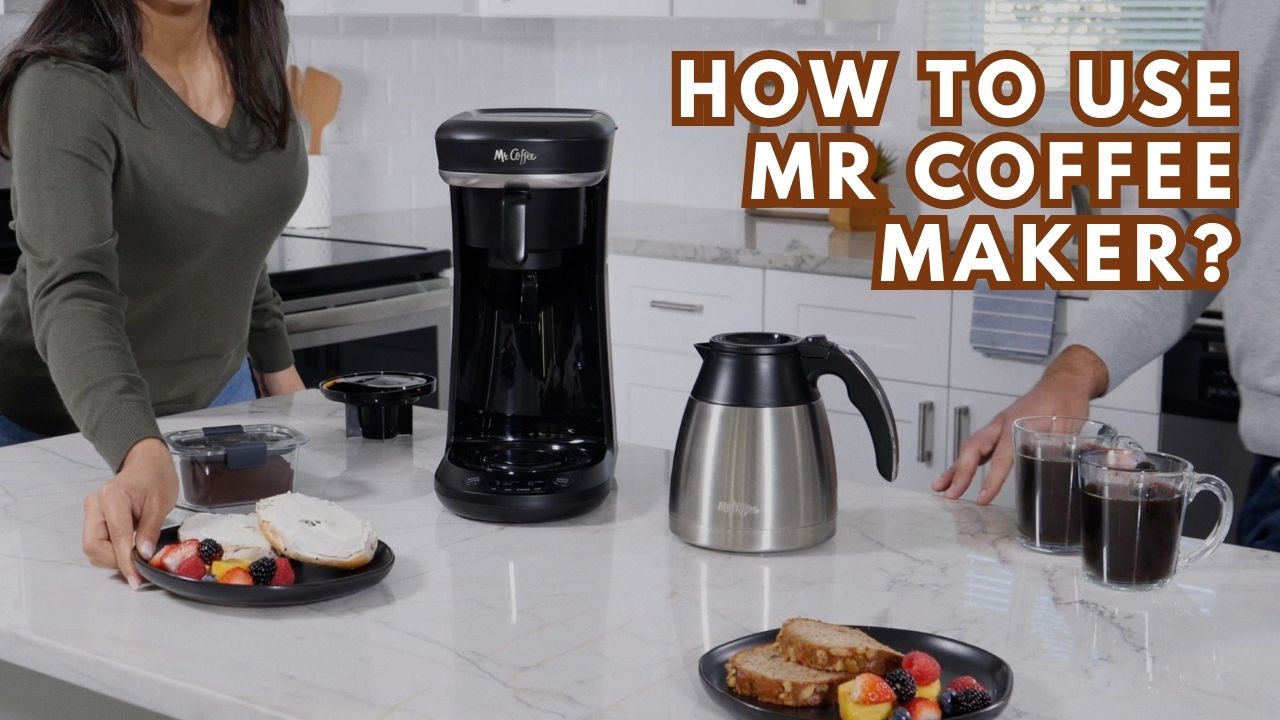
Step-by-Step Guide: How to Use Mr Coffee Maker
Now, let’s get to the heart of the matter – how to use Mr Coffee maker to brew that perfect cup of joe:
Step 1: Wash Your Coffee Maker
Before you start brewing, give all the parts a good wash. This includes the carafe, brew basket, and any removable components. Use mild dish soap and rinse thoroughly to get rid of any manufacturing residues.
Step 2: Prepare Your Coffee Grounds
Decide on your coffee-to-water ratio. A standard rule is one to two tablespoons of coffee grounds per six ounces of water, but you can adjust this to suit your taste.
Step 3: Add Water
Fill the water reservoir with the amount of water you want for your brew. Make sure not to overfill it, as there’s usually a maximum line to guide you.
Step 4: Place a Filter (If Needed)
If your coffee maker uses disposable paper filters, insert one into the brew basket. If it has a reusable filter, you won’t need to do this step.
Step 5: Add Coffee Grounds
Put your coffee grounds into the filter or the brew basket. Spread them out evenly for an even extraction.
Step 6: Start Brewing
Now, it’s showtime! Turn on your Mr. Coffee maker using the appropriate buttons or switches. Some models have options for brew strength, so select your preference if available.
Step 7: Wait Patiently
While your coffee maker works its magic, give it some time to brew. It usually takes a few minutes for the hot water to pass through the coffee grounds and fill your carafe.
Step 8: Serve and Sip
Once your coffee is ready, carefully pour it from the carafe into your favorite mug. Be cautious – it’s hot!
Step 9: Keep It Warm (Optional)
If you’re not planning to drink all the coffee right away, place the carafe back on the warming plate to keep it nice and hot.
Step 10: Clean Up
After your coffee adventure, make sure to turn off your Mr. Coffee maker. Then, rinse the carafe and the brew basket to prevent coffee residue from drying and becoming stubborn to clean.
How to use Mr Coffee Maker for Different models
Certainly! Mr. Coffee offers various models with different features, so let’s dive into how to use some popular ones:
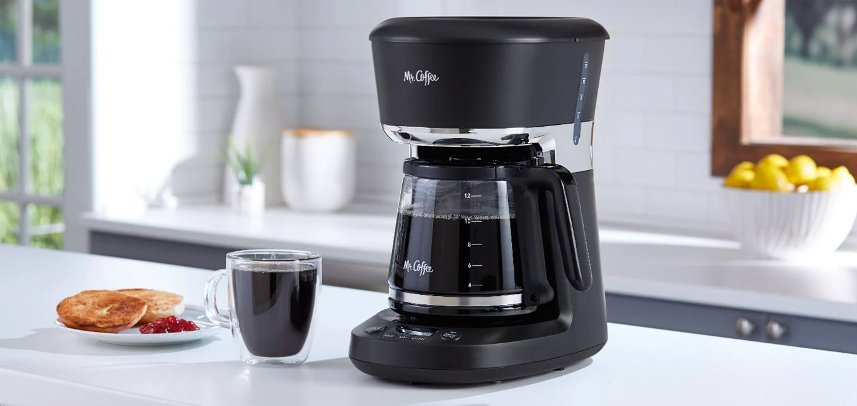
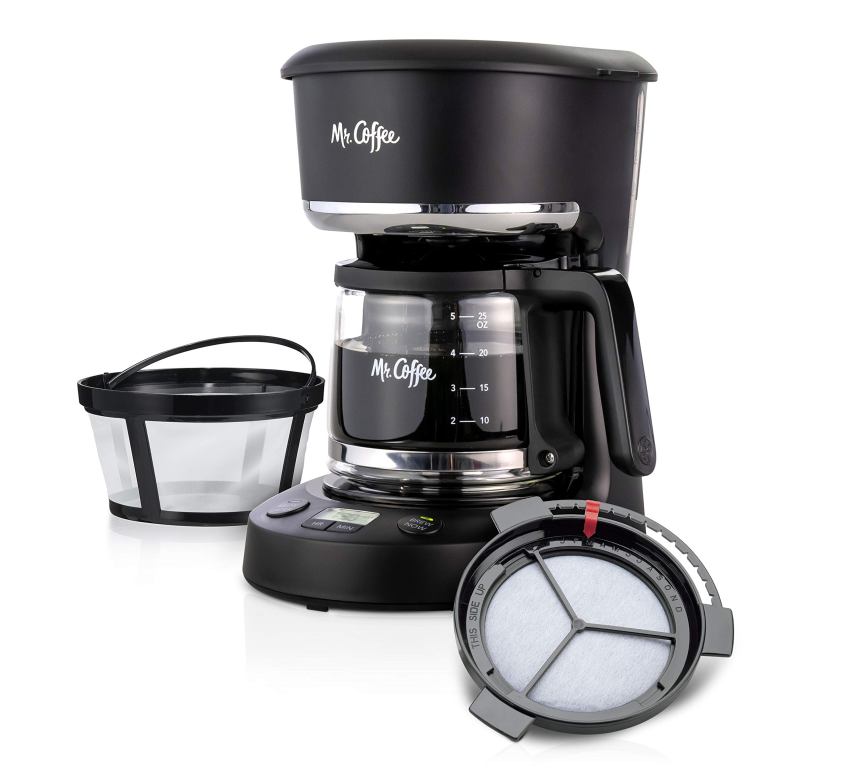
Mr. Coffee 12-Cup Programmable Coffee Maker
Features:
- Programmable timer for delayed brewing.
- Brew strength selector.
- Pause ‘N Serve feature.
- Water filtration system.
- Auto shut-off.
How to Use:
- Place the coffee maker on a clean, dry surface and make sure it’s plugged in.
- Lift the water reservoir lid and pour the desired amount of cold, filtered water into the reservoir. Close the lid.
- Open the brew basket door and insert a paper coffee filter or the reusable filter.
- Measure the appropriate amount of coffee grounds based on your taste preference and place them into the filter.
- Close the brew basket door.
- Set the time on the programmable clock by pressing the “Hour” and “Minute” buttons.
- Choose your brew strength by pressing the “Brew Strength” button.
- Press the “On/Off” button to start brewing. The coffee maker will begin brewing at the programmed time.
- If you can’t wait for the full brew cycle to finish, use the “Pause ‘N Serve” feature to pour a cup of coffee mid-brew.
- After brewing, the coffee maker will automatically shut off. Serve your coffee, and enjoy!
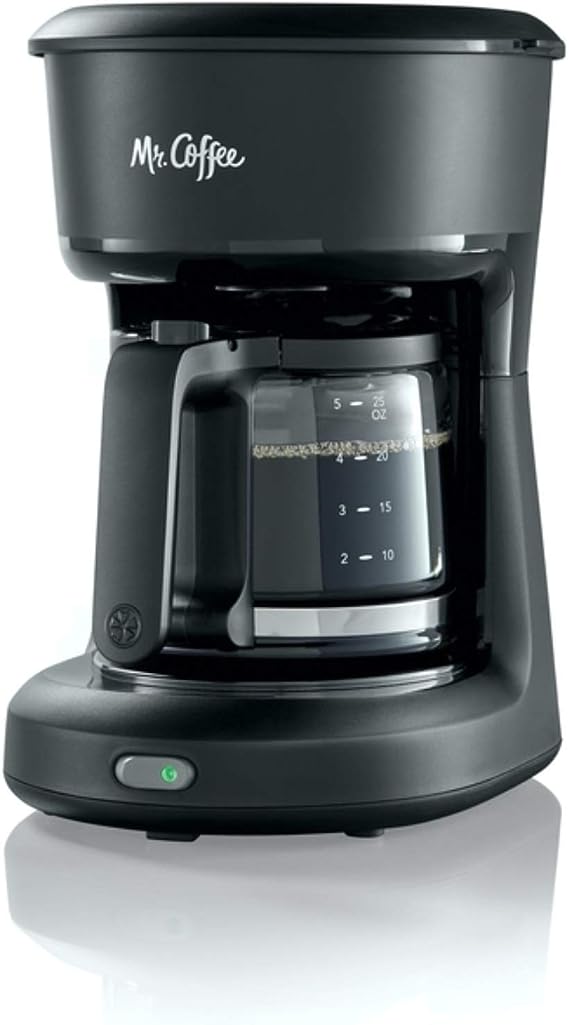
Mr. Coffee 4-Cup Switch Coffee Maker
Features:
- Compact size, ideal for small spaces.
- Simple on/off operation.
- Dual water windows for easy filling.
- Grab-A-Cup Auto Pause feature.
How to Use:
- Place the coffee maker on a flat, stable surface and plug it in.
- Open the top lid and remove the filter basket by lifting it out.
- Place a paper coffee filter in the basket or use the reusable filter.
- Add the desired amount of coffee grounds to the filter.
- Put the filter basket back into the coffee maker.
- Fill the water reservoir with the appropriate amount of cold water for your desired number of cups. You can use the dual water windows to measure.
- Close the top lid.
- Turn the coffee maker on by flipping the switch to the “On” position.
- The coffee will start brewing, and you can use the Grab-A-Cup Auto Pause feature to pour a cup before the full brew cycle completes.
- Once brewing is finished, the coffee maker will turn off automatically. Serve and enjoy your coffee!
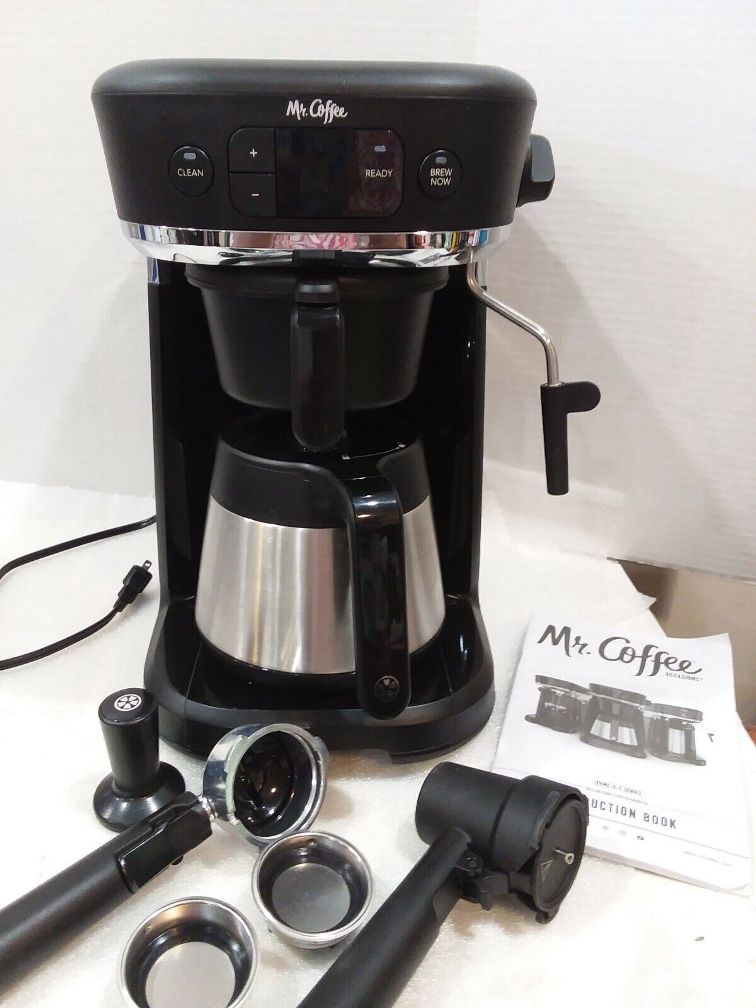
Mr. Coffee Espresso and Cappuccino Maker
Features:
- Espresso, cappuccino, and latte options.
- Frothing arm for milk-based drinks.
- 15-bar pump system.
- Removable water reservoir.
How to Use:
- Place the espresso maker on a clean, flat surface and ensure it’s plugged in.
- Fill the water reservoir with cold water to the desired level.
- Turn the machine on and allow it to heat up.
- While it’s heating, prepare your coffee grounds in the filter basket and tamp them down evenly.
- Insert the filter basket into the portafilter and lock it into place.
- Place your cup or glasses under the portafilter.
- Select your desired coffee option (espresso, cappuccino, or latte) on the control panel.
- The machine will start brewing and extracting the coffee.
- If you’re making a milk-based drink like a cappuccino or latte, use the frothing arm to froth and steam the milk.
- Once the brewing and frothing are complete, your coffee or espresso is ready to be enjoyed!
These are just a few examples of Mr. Coffee models, each with its unique features and functions. Be sure to refer to your specific model’s user manual for detailed instructions, as features and usage may vary.
How to Make Coffee in Mr Coffee Coffee Maker
Here’s a step-by-step guide on how to make coffee in your Mr. Coffee maker:
Step 1: Prepare Your Mr. Coffee Maker
- Place your Mr. Coffee maker on a clean, dry, and flat surface.
- Ensure it’s plugged in and turned off.
- Make sure the carafe is clean and in place.
Step 2: Add a Coffee Filter
- Open the top lid of the coffee maker.
- Insert a coffee filter into the brew basket. You can use either a disposable paper filter or a reusable one, depending on your preference.
Step 3: Measure Coffee Grounds
- Measure the desired amount of coffee grounds based on your taste preference. Typically, use one to two tablespoons of coffee grounds for every six ounces of water. Adjust to your liking.
Step 4: Add Water
- Lift the water reservoir lid and pour cold, fresh water into the water reservoir. Fill it with the amount of water you need for the number of cups you want to brew.
- Most Mr. Coffee makers have clear water windows to help you measure.
Step 5: Start Brewing
- Close the water reservoir lid.
- Turn on your Mr. Coffee maker using the appropriate button or switch. Some models may have additional options like brew strength or delay brew. Adjust these settings as desired.
Step 6: Wait for Brewing to Complete
- Your Mr. Coffee machine will begin brewing, and hot water will flow through the coffee grounds.
- Wait for the full brew cycle to finish. This usually takes a few minutes.
Step 7: Pour and Enjoy
- Once the brewing is complete, carefully pour the freshly brewed coffee into your favorite mug.
- Be cautious, as it will be hot!
How to Clean Mr Coffee Coffee Maker
Cleaning your Mr. Coffee coffee maker is essential to maintain its performance and ensure each cup of coffee tastes fresh and delicious. Here’s a step-by-step guide on how to clean your Mr. Coffee coffee maker:
1. Gather Your Cleaning Supplies:
- You’ll need white vinegar, water, a soft cloth or sponge, mild dish soap, and a clean, dry towel.
2. Turn Off and Unplug:
- Ensure your coffee maker is turned off and unplugged to prevent any accidents during the cleaning process.
3. Discard Used Grounds and Filter:
- If there are used coffee grounds and a coffee filter in the brew basket, remove and discard them.
4. Clean the Carafe:
- Wash the carafe, lid, and filter basket with warm, soapy water. Rinse thoroughly and let them air dry.
5. Mix a Cleaning Solution:
- Fill the carafe with a mixture of equal parts white vinegar and water. You can adjust the amount based on the size of your coffee maker.
6. Run a Cleaning Cycle:
- Place the carafe back on the coffee maker’s warming plate.
- Pour the vinegar and water mixture into the water reservoir.
7. Start the Coffee Maker:
- Turn on your coffee maker and run a brewing cycle as if you were making coffee. This will allow the vinegar and water solution to move through the coffee maker’s internal components.
8. Pause and Let It Sit:
- After the vinegar solution has partially passed through the coffee maker, pause the brewing cycle. Let the solution sit in the coffee maker for about 30 minutes. This will help remove mineral deposits and residue.
9. Finish the Cleaning Cycle:
- Resume the brewing cycle to allow the remaining vinegar solution to pass through. Dispose of the vinegar mixture once the cycle is complete.
10. Rinse with Water:
- Fill the water reservoir with clean, cold water.
- Run a complete brewing cycle with just water to rinse out any remaining vinegar.
11. Wipe Down the Exterior:
- While the coffee maker is cooling down, wipe down the exterior with a damp cloth or sponge and a mild dish soap if needed.
12. Clean the Carafe and Accessories:
- Clean the carafe, lid, and filter basket once again with warm, soapy water to remove any vinegar residue.
13. Dry and Reassemble:
- Ensure all parts are thoroughly dry before reassembling your coffee maker.
14. Run a Test Brew:
- Fill the water reservoir with clean water and run a test brewing cycle with no coffee grounds to ensure that the vinegar odor is completely gone.
15. Regular Maintenance:
- To keep your coffee maker in top shape, clean the carafe and filter basket after each use. Regularly descale the coffee maker with the vinegar and water mixture every 1-2 months, depending on your water hardness.
By following these steps and maintaining a clean coffee maker, you’ll continue to enjoy fresh and flavorful coffee every morning.
Tips on How to Use Mr Coffee Maker
Now that you know how to use your Mr. Coffee maker, here are some tips to elevate your coffee game:
- Use Fresh Coffee Beans: The fresher the beans, the better the taste. Try to buy whole beans and grind them just before brewing.
- Experiment with Brew Strength: If your coffee maker has brew strength settings, don’t hesitate to try different levels until you find your perfect brew.
- Use Filtered Water: High-quality water can make a big difference in the taste of your coffee. If your tap water doesn’t taste great, consider using filtered water.
- Clean Regularly: A clean coffee maker makes better coffee. Be sure to clean all removable parts and the carafe after each use.
- Try Different Coffees: Don’t limit yourself to a single type of coffee bean. Experiment with various blends and origins to discover new flavors.
Troubleshooting Your Mr. Coffee Maker
Sometimes, even the most reliable coffee makers can run into issues. Here are a few common problems and how to troubleshoot them:
- Coffee Tastes Weak: If your coffee tastes weak, try adding more coffee grounds or adjusting the brew strength setting if your machine has one.
- Coffee Tastes Bitter: Bitter coffee can result from over-extraction. Use fewer coffee grounds or coarser grinds, and be sure to clean your coffee maker regularly.
- Coffee Maker Doesn’t Turn On: Check that the coffee maker is properly plugged in and that there’s power in the outlet. If it still doesn’t turn on, contact Mr. Coffee customer support.
- Leaks or Drips: Leaks or drips can occur if the carafe isn’t properly placed on the warming plate. Make sure it’s sitting securely.
- Slow Brewing: If your coffee maker is taking longer than usual to brew, it might need descaling. Follow the manufacturer’s instructions to descale it.
Best Selling Product….
Mr. Coffee 2129512, 5-Cup Mini Brew Switch Coffee Maker, Black…

Must Read, How to Use Cuisinart Coffee Maker: A Perfect Guide
Must Read, How to Use Keurig Coffee Maker: A Perfect Guide
Conclusion
And there you have it – a comprehensive guide on how to use Mr Coffee maker. With a few simple steps and some coffee grounds, you can brew a delicious cup of joe right in the comfort of your home. So, go ahead, start your mornings the right way, and enjoy every sip of that perfectly brewed coffee. Happy brewing!
In conclusion, mastering the art of using your Mr. Coffee maker is a straightforward yet satisfying endeavor. Whether you have the 12-Cup Programmable Coffee Maker, the 4-Cup Switch Coffee Maker, or the Espresso and Cappuccino Maker, the basic steps remain consistent: prepare, brew, and enjoy. As a coffee lover, you’ve got the advantage of starting your day with a perfect cup of coffee right at home.
Remember to choose high-quality coffee beans, adjust the coffee-to-water ratio to your liking, and experiment with brew strength settings if available. Cleaning your coffee maker after each use is key to maintaining its performance and ensuring each cup tastes as good as the first.
With these skills under your belt, you’re well on your way to becoming your household’s go-to barista. So go ahead, brew with confidence, and relish in the aromatic goodness of your freshly made coffee. Happy brewing, and may your mornings be filled with the rich, invigorating aroma of a perfectly brewed cup of joe!
Related Keywords:
how to make coffee mr coffee
how to clean my mr coffee maker
how to use mr coffee maker 12 cup
how to use mr coffee coffee maker
how to make coffee in a mr coffee