Table of Contents
Hey there! If you’re like me, your coffee maker is your best buddy in the morning, delivering that glorious caffeine fix. But here’s the catch – coffee makers need some love too, and that means cleaning. Now, the go-to method for many is using vinegar, but what if you’re not a fan of that sharp smell? No worries, my friends! Today, we’re learning How to Clean a Coffee Maker Without Vinegar, and I promise it’s not rocket science. So, grab your favorite brew, and let’s get your coffee maker squeaky clean without that pesky vinegar smell!
Why Cleaning Your Coffee Maker Matters
Before we jump into the coffee maker cleaning process, let’s quickly chat about why it’s essential to give your coffee maker some TLC:
- Flavor: Over time, coffee oils and residue build up inside the machine, leading to off-flavors and bitterness in your brew. Cleaning keeps your coffee tasting fresh and delicious.
- Performance: A clean coffee maker works more efficiently, ensuring you get the best-tasting coffee possible.
- Hygiene: Coffee makers can be a breeding ground for bacteria and mold if not cleaned regularly. Cleaning prevents these unwanted guests from crashing your coffee party.

Gather Your Cleaning Arsenal
First things first, let’s assemble the tools you’ll need for this coffee maker cleaning adventure:
- Dish Soap: Opt for a mild, fragrance-free dish soap. We don’t want any lingering soapy tastes in our coffee.
- Warm Water: You’ll need this for rinsing and soaking.
- Sponge or Soft Brush: Something gentle to scrub away coffee gunk without scratching the machine.
- Cleaning Rod or Wooden Spoon: This comes in handy for dislodging stubborn coffee grounds.
- Paper Towels or Cloth: For drying and wiping.
- Baking Soda: A kitchen superhero for cleaning and deodorizing.
- Lemon Juice: It’s a natural cleaner that leaves a fresh scent.
- Toothbrush: Great for getting into small, hard-to-reach spots.
Step-by-Step Guide: How to Clean a Coffee Maker Without Vinegar
Now, let’s get down to the cleaning process. Follow these steps, and your coffee maker will be sparkling clean without a hint of vinegar:
Step 1: Unplug and Empty
Safety first! Unplug your coffee maker and make sure it’s completely cool. Next, remove any remaining coffee from the carafe and grounds basket. Discard used coffee grounds.
Step 2: Prepare Your Cleaning Solution
Get a clean container or mixing bowl and fill it with warm water. Add a few drops of mild dish soap. If you prefer a more natural approach, you can use a mixture of warm water and lemon juice or warm water and baking soda.
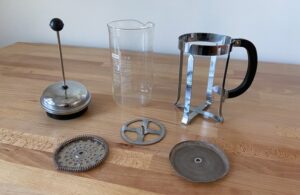
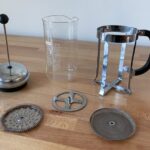
Step 3: Start with Removable Parts
If your coffee maker has removable parts like the carafe, grounds basket, and lid, take them out and wash them separately in warm, soapy water. Use a sponge or soft brush to scrub away any coffee stains or residue. Rinse thoroughly with clean water and let them air dry.
Step 4: Clean the Machine
Now, let’s tackle the coffee maker itself. Here’s how:
a. Dampen a clean sponge or cloth with the soapy water solution or the lemon juice mixture.
b. Wipe down the exterior of the coffee maker, including the control panel and any buttons or switches. Pay attention to any sticky spots or spilled coffee.
c. Dip your cleaning rod or wooden spoon into the soapy water solution and use it to clean the coffee maker’s nooks and crannies, especially around the filter area and the coffee spout.
d. For those hard-to-reach spots, like the coffee maker’s heating plate, use a toothbrush to scrub away any residue.
Step 5: Rinse and Dry
Once you’ve given your coffee maker a good cleaning, rinse all parts thoroughly with clean water. This step is crucial to ensure there’s no soap or cleaning solution residue left behind.
Step 6: Deodorize with Baking Soda
If your coffee maker has any lingering odors (like that morning coffee smell we love), baking soda can come to the rescue. Here’s what to do:
a. Dampen a cloth or sponge with clean water and sprinkle it with a small amount of baking soda.
b. Use the cloth to wipe the interior of the coffee maker, including the carafe and the water reservoir.
c. Rinse everything thoroughly with clean water to remove any traces of baking soda.
Step 7: Reassemble and Brew a Test Pot
Once all the parts are dry and your coffee maker smells fresh, it’s time to put everything back together. Reassemble the carafe, grounds basket, and any other removable parts.
Now, fill the water reservoir with fresh water and brew a
pot of hot water (no coffee grounds). This helps flush out any remaining cleaning solution and ensures your next cup of coffee won’t have any soapy flavors.
Step 8: Enjoy Your Fresh Brew
After brewing a pot of hot water, your coffee maker should be good to go. Now, it’s time to enjoy a fresh cup of coffee without any vinegar odors or off-flavors. Plug it back in, add your coffee grounds, and brew as usual.
Regular Cleaning Routine
Cleaning your coffee maker without vinegar should be part of your regular coffee-making routine. Here are some tips to keep it sparkling clean:
- Daily: Empty the used coffee grounds and rinse the carafe and grounds basket after each use. Let them air dry.
- Weekly: Give the exterior a wipe down and check for any spills or splatters.
- Monthly: Perform a more thorough cleaning using the steps outlined above, including cleaning the interior with baking soda to prevent odors.
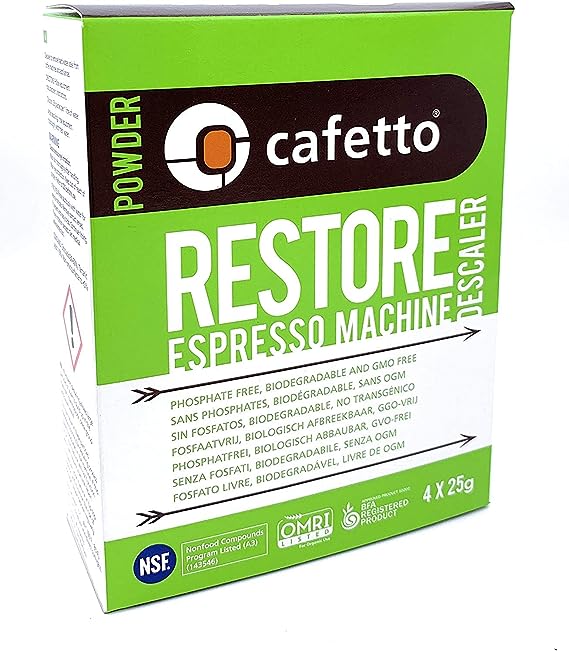
Best Selling Product….
Cafetto Restore Espresso Machine Descaler, Coffee Machine Cleaning Powder…
Must Read, How to Use Cuisinart Coffee Maker: A Perfect Guide
Wrapping Up
In conclusion, mastering how to clean a coffee maker without vinegar opens up a world of fresh, flavorful coffee without the lingering vinegar scent. With just a few household items and some simple steps, you can keep your coffee maker in top shape, ensuring each cup of coffee is a delightful experience. So, here’s to clean, odor-free coffee makers and the delicious brews they create. Happy sipping!